General & Family Dentistry
How Sealants Safeguard Teeth From Cavities
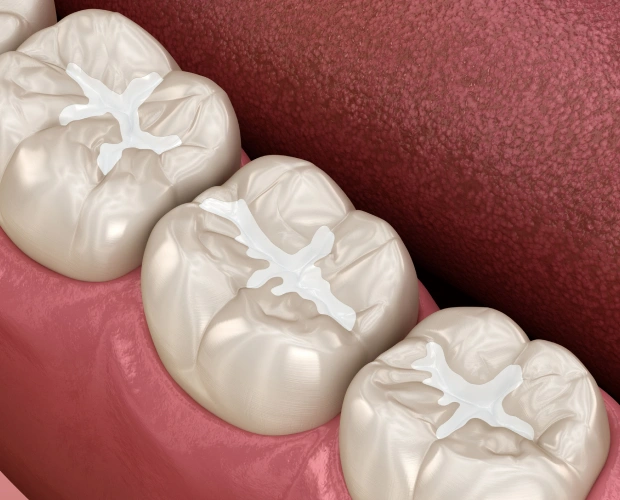
A sealant is a type of varnish that is placed in deep pits and grooves to prevent the teeth from developing cavities. No numbing is needed. The grooves and pits are cleaned, a bonding material is placed, and the sealant varnish is placed over top. These do not interfere with bite and are done very quickly. Traditionally, sealants are placed on children as their adult molars grow in, although they can be very effective if used on adults as well. Studies have shown that sealants help reduce the risk of cavities by 80%!
Shield Your Teeth from Cavities With Dental Sealants
Dental sealants are a thin, protective coating applied to the chewing surfaces of the back teeth—mainly molars and premolars. These teeth often have deep grooves that can be difficult to clean, making them more prone to cavities. By covering these grooves, sealants create a smoother surface that’s easier to brush and helps prevent food particles and bacteria from settling in. While sealants are durable and long-lasting, your dentist should check them regularly to ensure they haven’t worn down or chipped.
Why Are Sealants Helpful?
Sealants add an extra layer of protection to your teeth—especially in the deep grooves where cavities are most likely to form. They’re a great preventive option for people of all ages:
- Kids and Teens: Sealants work best when applied as soon as the first permanent molars come in, usually around age 6. They help protect teeth during the cavity-prone years through the teenage period.
- Adults: Even fully grown teeth can benefit from sealants. If you have deep grooves that haven’t developed decay, sealants can help prevent future cavities.
- Young Children (Baby Teeth): In some cases, sealants may be recommended for baby teeth—especially if the child has deep grooves or a higher risk of cavities.
How Are Sealants Applied?
Getting sealants is easy, quick, and completely painless. The entire process takes only a few minutes per tooth. Here’s what happens:
- The tooth is thoroughly cleaned and dried.
- Cotton or a small barrier is placed to keep the area dry.
- A special solution is applied to gently roughen the surface so the sealant can bond properly.
- The tooth is rinsed and dried again.
- The sealant material is carefully painted onto the chewing surface.
- It then hardens either naturally or with the help of a curing light.
To keep your sealants in good condition, remember to brush and floss daily, maintain a healthy diet, and visit your dentist regularly. Sealants are a simple, effective way to protect your smile for years to come.
Long-Term Role of Fluoride in Oral Health
Fluoride treatment provides the most benefit when consistently coupled with daily oral hygiene at home. Key practices such as brushing twice a day with a fluoride toothpaste, flossing, minimizing sugary snacks, and maintaining regular checkups at West Seattle Smile Co. in Seattle, WA collectively lead to stronger, healthier teeth. Ultimately, professional fluoride treatments contribute an essential layer of defense, ensuring your smile remains protected for years to come.
The Easiest Way to Prevent Cavities
Prevention is always easier, faster, and more affordable than treating decay. Give your teeth the advanced protection they deserve with professional fluoride care. Contact West Seattle Smile Co. in Seattle, WA today to schedule your appointment and take the next step toward keeping your smile strong and cavity-free.